

Introduction #
You are at a coffee shop with your laptop, and you want to open the dashboard running on the server in your living room. The old answer is a port forward, a dynamic DNS record, and a firewall rule you will forget about. The better answer is a mesh VPN where every device dials out and nothing listens on the public internet.
Tailscale is the name most people reach for first. NetBird covers the same ground, and its control plane is open source, so you can run the whole thing yourself later without changing how your devices connect.
This guide sets up NetBird on a home network with three devices: an Ubuntu server (24.04 or newer) that also acts as the gateway to the rest of the LAN, a laptop, and an Android phone. The server and the phone enroll with a setup key, which is the path I recommend. The laptop uses the normal SSO login so you can see both flows side by side.
sudo netbird up --setup-key, then create a Network in the dashboard that exposes 192.168.1.0/24 through that server. Add a policy, install the Android app, and you are done.
What the free plan actually gives you #
This tutorial uses the hosted cloud at app.netbird.io, so the limits below decide whether the setup fits your home.
| Item | Free plan |
|---|---|
| Price | €0 |
| Users | up to 5 |
| Machines | 100 |
| Features | peer-to-peer encryption, Networks, social SSO and MFA, access controls, private DNS, Network Routes, NetBird SSH |
| Support | community |
For a homelab, 100 machines is far more than a rack of Proxmox guests and a few phones will ever need. The user limit is the one to watch: all devices that log in with SSO count as users, so a household of five is the practical ceiling. Paid plans start at €6 per user per month and add enterprise identity providers, audit logs, and device posture checks.
Self-hosting the control plane is the other way out of those limits, and NetBird supports it. That is a separate project with its own database, certificates, and upgrades, so this article stays on the cloud.
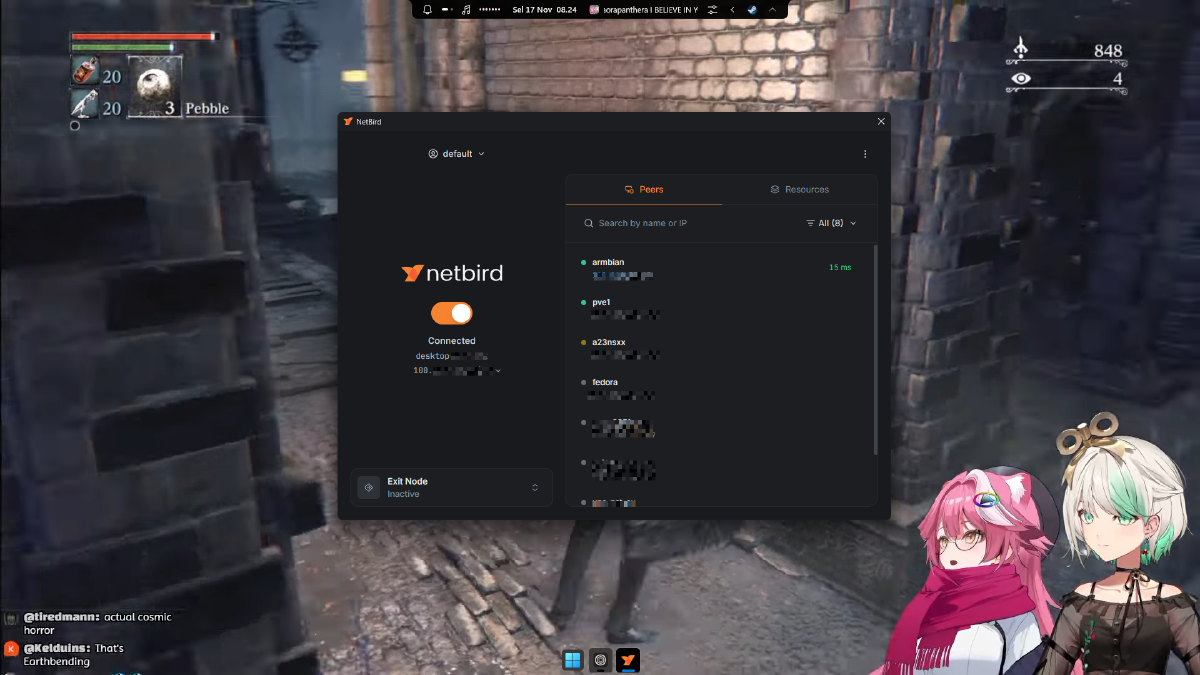
.netbird.selfhosted and some machines in the peer list come from that test network. On NetBird Cloud the same peers appear under .netbird.cloud, and enrollment uses https://api.netbird.io:443. The menus and every step below are identical on both.
The setup at a glance #
| Device | Role | Address |
|---|---|---|
homeserver |
Ubuntu 24.04+, NetBird peer, routing peer for the LAN | 192.168.1.10 |
| Laptop | regular peer, used as the “outside the house” client | DHCP |
| Android phone | regular peer, tested on mobile data | DHCP |
The addresses are placeholders. Replace 192.168.1.0/24 and 192.168.1.10 with whatever your router hands out. Everything else in the guide stays the same.
NetBird gives each peer an address in the 100.64.0.0/10 range on a wt0 interface. That overlay network is separate from your LAN, which is why your laptop can reach 100.x.y.z from anywhere while 192.168.1.10 still means “the server at home.”
Step 1: Create the account and a setup key #
Sign in at app.netbird.io with Google, Microsoft, GitHub, or an email link. The first device you add usually creates the account for you.
Then open Settings → Setup Keys → Create Setup Key.
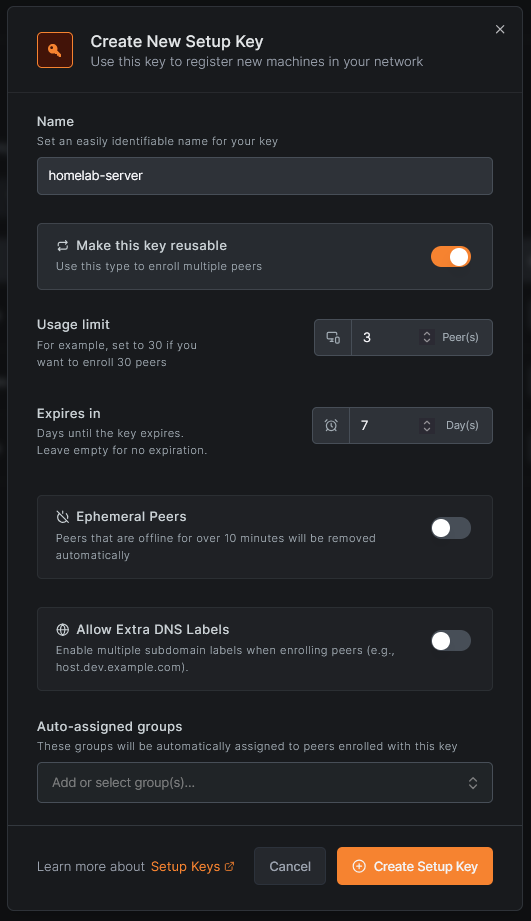
Fill it in like this:
- Name:
homelab-server - Type: reusable
- Expiration: 7 days (the dialog pre-fills this)
- Usage limit: 3
- Auto-assign groups: leave empty for now
A reusable key with a low usage limit is the practical middle ground. A one-off key is stricter, but you will enroll a second machine sooner than you think and then have to make another key. Three uses covers the server, a spare, and one mistake.
Copy the key when it appears. NetBird will not show it again in full.
Two details worth knowing before you click around:
Peers → Add Peer → Generate Keyalso works, but it creates a one-off key that expires in 24 hours with no groups attached. The Settings page gives you control over all of it.- Peers registered with a setup key are not subject to login session expiration. That matters for a server that should stay connected for months without anyone opening a browser on it.
Step 2: Install NetBird on Ubuntu #
The install script handles the repository, the package, and the systemd unit in one go:
curl -fsSL https://pkgs.netbird.io/install.sh | shIt detects your distribution and architecture, adds the NetBird package repository, and installs netbird with a netbird systemd service. On a headless server you never need the desktop app, so the CLI is all you want.
Check that the daemon is running:
sudo systemctl status netbird --no-pagerIf the service is inactive, start and enable it:
sudo systemctl enable --now netbirdNow enroll the machine with the key from step 1:
sudo netbird up --setup-key <SETUP-KEY>Use sudo here. The client keeps a profile per operating system user, and a peer enrolled as root is the one the systemd service uses. Enrolling as your normal user gives you a second, separate profile that the service will not touch.
Verify the result:
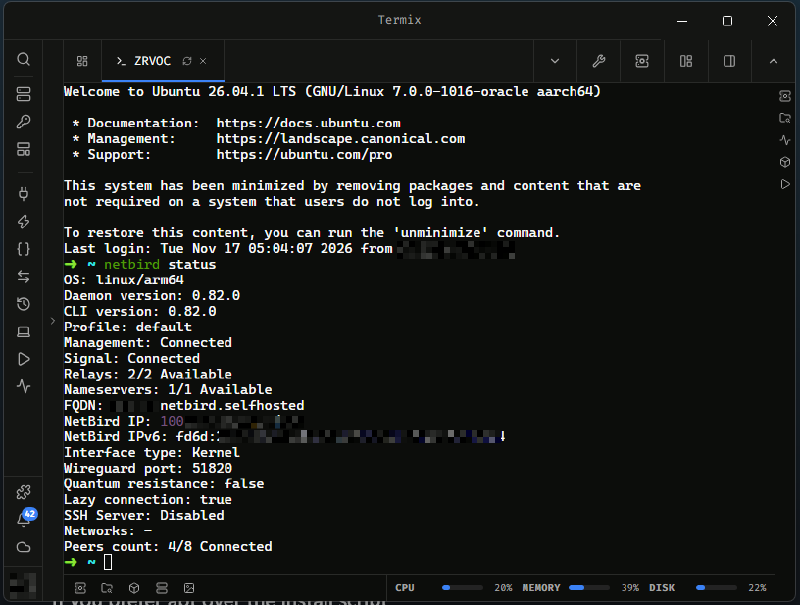
sudo netbird status
ip addr show wt0
netbird status prints the management server, the peer’s NetBird IP, and the connection state. wt0 is the WireGuard interface, and its inet line is the 100.x address other peers will use.
If you prefer apt over the install script #
The package is also in a signed APT repository:
sudo apt-get update
sudo apt-get install ca-certificates curl gnupg -y
curl -sSL https://pkgs.netbird.io/debian/public.key | sudo gpg --dearmor --output /usr/share/keyrings/netbird-archive-keyring.gpg
echo 'deb [signed-by=/usr/share/keyrings/netbird-archive-keyring.gpg] https://pkgs.netbird.io/debian stable main' | sudo tee /etc/apt/sources.list.d/netbird.list
sudo apt-get update
sudo apt-get install netbird
The result is the same. Pick one method and stick to it so future upgrades match how the package was installed.
Step 3: Enroll the laptop with SSO #
On a machine where you sit in front of a browser, the interactive login is simpler than passing keys around. Install the client for your OS from the download page, then run:
netbird upThe command opens a browser window, you sign in with the same account you used for the dashboard, and the peer appears in the console. No sudo needed on a desktop.
This is the same account, so the laptop lands in the same network as the server. What differs is the enrollment method, not the network.
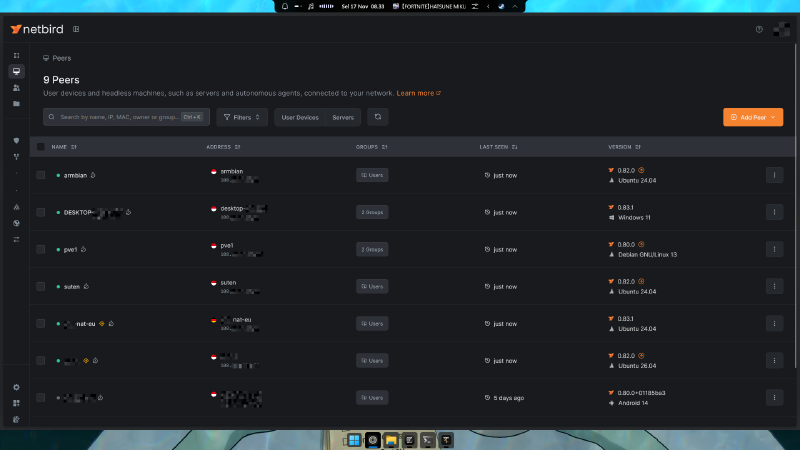
At this point both machines can already reach each other over 100.x addresses, because NetBird creates a default policy that allows all peers to talk to all peers. That policy is a convenience for onboarding and it is the first thing we will remove once real policies exist.
Step 4: Connect the Android phone #
Install NetBird from the Play Store, or grab the APK from the project’s GitHub releases if you avoid Play Services.
On first launch, tap Continue to accept the default management server. Then:
- Open the hamburger menu on the top left and pick Change Server.
- Enter
https://api.netbird.io:443. - Select + Add this device with a setup key and paste the key from step 1.
- Tap Change, then tap the NetBird logo to connect.
- Allow the VPN connection request when Android asks.
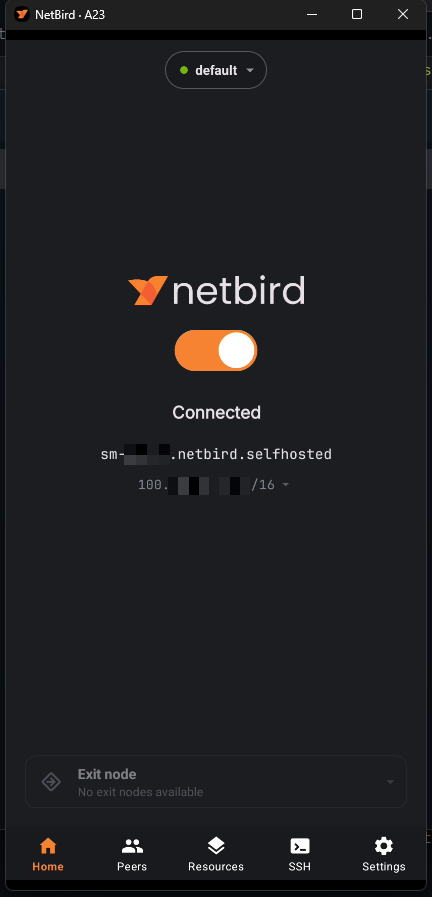
Changing the server wipes the app’s existing configuration, which is fine on a fresh install. If you skip the setup key entirely, the app asks you to sign in through the browser instead, and that also works. The key is there so the phone does not need a browser round trip every time you reinstall.
Test it now with Wi-Fi turned off. Open a browser on the phone and hit any service on 192.168.1.10. It will not load yet, because nothing has told NetBird that the LAN behind the server is reachable.
Step 5: Create the groups #
Groups are labels for peers and resources. Policies point at groups, not at individual machines, which is what keeps the rules readable later.
Open Access Control → Groups and create two:
| Group | Members |
|---|---|
remote-devices |
laptop, Android phone |
homelab |
the Ubuntu server |
Put the server in its own group now. You will need it if you ever want to reach a service running directly on the server, which is a different kind of policy from reaching the LAN behind it.
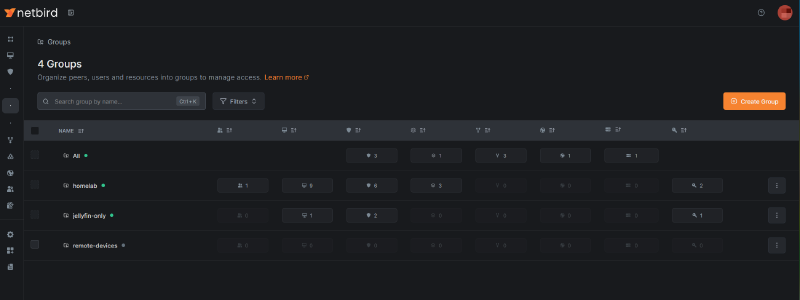
If you want new machines to land in a group automatically, edit the setup key and set Auto-assign groups. That only applies to peers registered after the change, so assign the existing ones by hand.
Step 6: Expose the LAN with a Network #
This is the part that replaces a traditional site-to-site VPN. Go to Networking → Network Routing → Networks and add a Network named Home LAN.
Inside it, add a resource:
- Name:
home-lan - Address:
192.168.1.0/24 - Resource group:
home-lan-resources(create it in the same dialog)
Then assign the Ubuntu server as the routing peer for this Network.
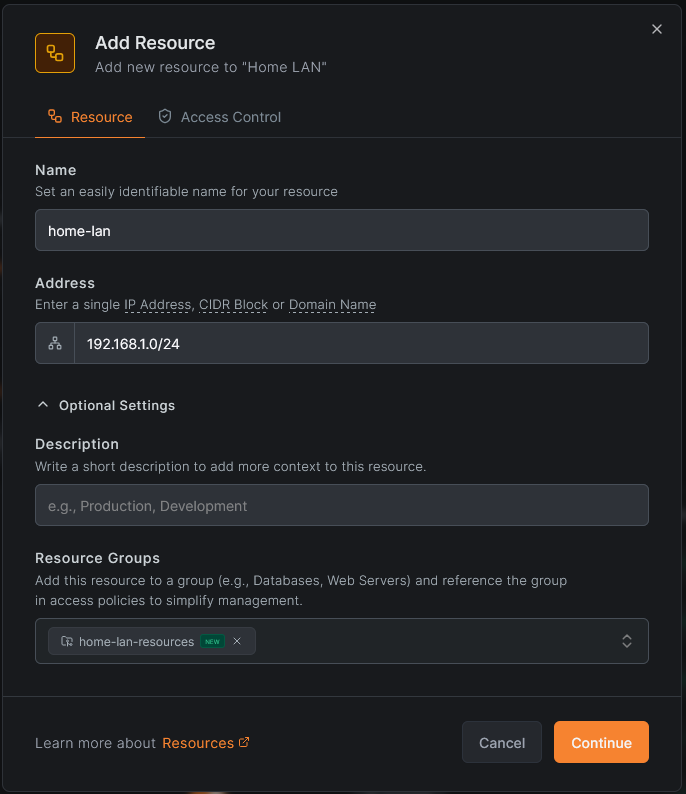
Now the access policy, in the Access Control tab of the resource dialog or under Access Control → Policies:
- Source:
remote-devices - Destination:
home-lan-resources - Protocol: ALL
- Ports: the selector is disabled while the protocol is ALL
Nothing is reachable until this policy exists. That is the intended behaviour, and it is the main difference from the older Routes feature, where a route without ACL groups allowed everything. Routes themselves are now deprecated for anything except exit nodes, so Networks is the path to use.
A /24 resource is convenient: every device on the LAN is reachable without touching the dashboard again. It is also broad. If one host matters more than the rest, for example the box holding backups, add it as a separate /32 resource with its own group and a narrower policy. You can keep both.
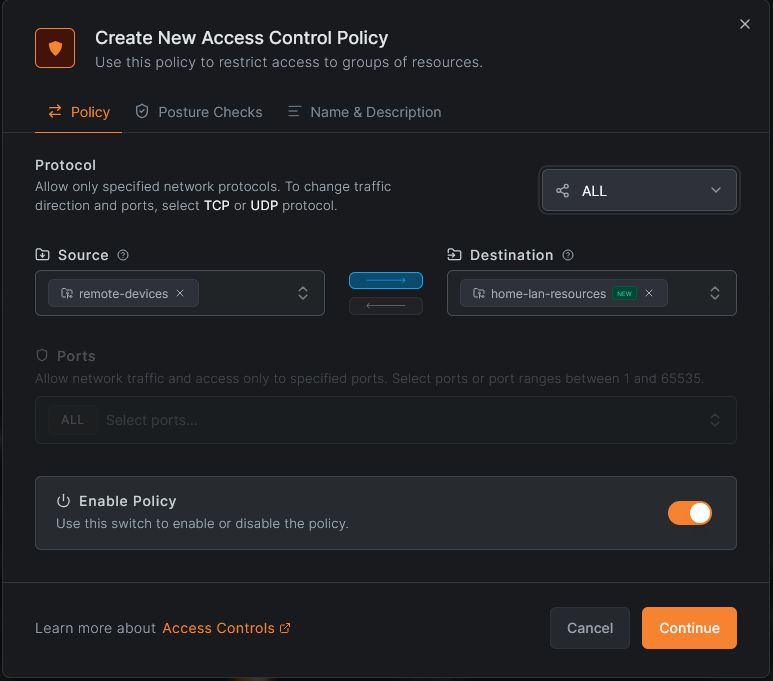
Masquerade is on by default on the routing peer. Traffic from your phone arrives at the LAN with the server’s address as its source, so no return route is needed on the router and no device needs to know NetBird exists.
Step 7: Remove the default policy without breaking anything #
The all-to-all default policy is still active. Before deleting it, make sure the access you actually want is covered.
| Traffic | Policy needed |
|---|---|
| Phone and laptop to LAN devices behind the server | Network policy from step 6 |
| Phone and laptop to services running on the server itself | Peer-to-peer policy: remote-devices → homelab |
| Server to laptop, for example to push a backup | Peer-to-peer policy in the other direction |
That second row trips people up. A Network resource policy covers traffic that passes through the routing peer. A dashboard, SSH daemon, or file share running on the routing peer is the peer’s own input chain, and it needs a peer-to-peer policy with the server’s group as the destination. Create it before you delete the default policy.
Then go to Access Control → Policies, open the default All to All rule, and delete it.
Step 8: Test from outside the house #
Turn off Wi-Fi on the phone and use mobile data. Then:
- Open the NetBird app and confirm it says Connected.
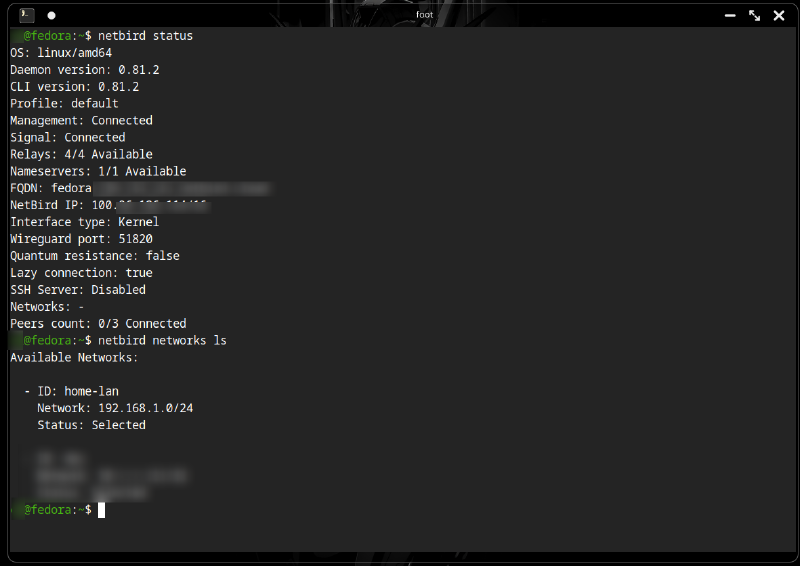
- From a terminal on the laptop, run
netbird networks lsto see the routes the client received. - Ping the server:
ping 192.168.1.10. - Open a web UI on the LAN by its address, for example
http://192.168.1.10:8080.
netbird status -d on the client shows which routing peer carries each route. If the route is listed but nothing answers, the problem is almost always the policy or the service listening only on localhost.
Optional: use the server as an exit node #
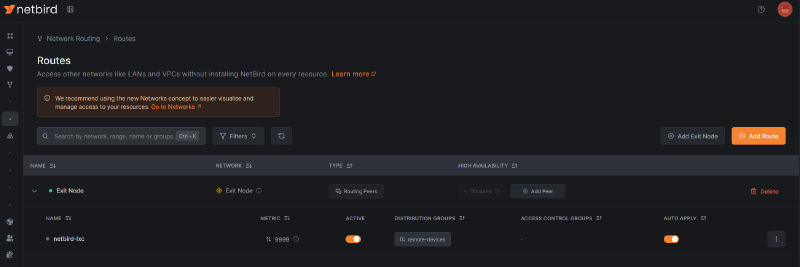
An exit node sends all of a device’s internet traffic through your home connection. Useful when you want your home IP, your Pi-hole, or a network that only allows one egress point. The trade-off is speed: your home upload rate becomes the ceiling for everything the phone does.
Setting it up:
- Open Peers and select the peer that will act as the exit node. A small always-on machine is enough, and it does not have to be the same host that routes your LAN.
- Click Add Exit Node.
- Assign the
remote-devicesgroup as the distribution group. - Leave Auto Apply on if you want connected devices to use it immediately, or turn it off so users opt in from the client menu.
Two things to check after that:
- DNS. Add a nameserver with the match domain set to
ALL, so DNS queries follow the tunnel instead of leaking to the local network. - Block LAN access. A
0.0.0.0/0route matches everything, including the routing peer’s own LAN. If that peer also serves the Network from step 6, do not enable Block LAN access on it, because that option breaks the LAN routes served by the same peer. Block LAN access belongs on a dedicated exit node that does nothing else.
Exit node routes are the one remaining case that still uses the older Routes model rather than Networks. That is a detail of the dashboard, not a reason to avoid the feature.
Troubleshooting #
| Symptom | Likely cause | Fix |
|---|---|---|
netbird status shows Disconnected |
daemon stopped, or the setup key expired before first use | sudo systemctl restart netbird, then re-enroll with a fresh key |
| Peer is connected but the LAN does not answer | no policy, or destination group not attached to the resource | Recheck source and destination groups in the policy |
| A service on the server itself is unreachable | Network policy covers the forward chain only, not the peer’s own services | Add a peer-to-peer policy with the homelab group as destination |
| Domain resource does not resolve | routing peer cannot resolve the name | Add a nameserver for the routing peer’s group, or use an IP resource |
| Android connected, nothing loads | exit node selected without a DNS entry, or policy missing | Add the ALL DNS entry, then reopen the app |
| Everything broke after deleting the default policy | no replacement peer-to-peer policy | Recreate the default policy temporarily, then add the missing rule |
A few security notes #
Treat a setup key like a password for your network. Revoke it under Settings → Setup Keys once every device is enrolled, and know that revoking a key does not disconnect machines that already used it. If a laptop is lost, remove that peer instead.
Delete the all-to-all policy early. The whole point of the Network model is that access is explicit, and leaving a blanket allow rule in place undoes it.
Prefer /32 resources for anything sensitive, and keep the exit node separate from the routing peer when you can. An exit node with Block LAN access enabled is a cleaner boundary than one machine doing two jobs badly.
Wrapping up #
The pieces that matter are small: one setup key, one install, one Network, one policy. Everything else is dashboard tidying.
Once this works, the natural next step is moving the control plane to your own server. NetBird is built for that, and the client configuration on your devices barely changes.