
If you followed the previous tutorials on How to Setup Free SSL in Your Homelab Using Traefik and Cloudflare Without Opening HTTP Ports and How to Secure Your Homelab Using Traefik Reverse Proxy for Docker, your Traefik setup should be solid — automated SSL, clean routing, and all services protected behind a reverse proxy.
Now the question is: what if you have many containers but limited server RAM?
For instance, you might be running Vaultwarden, Gitea, Paperless-ngx, Nextcloud, and several other services simultaneously. In reality, most of these services are rarely accessed — perhaps only a few times a day, or even once a week. Yet, they continue to consume RAM 24/7.
This is where Sablier comes in.
What is Sablier? #
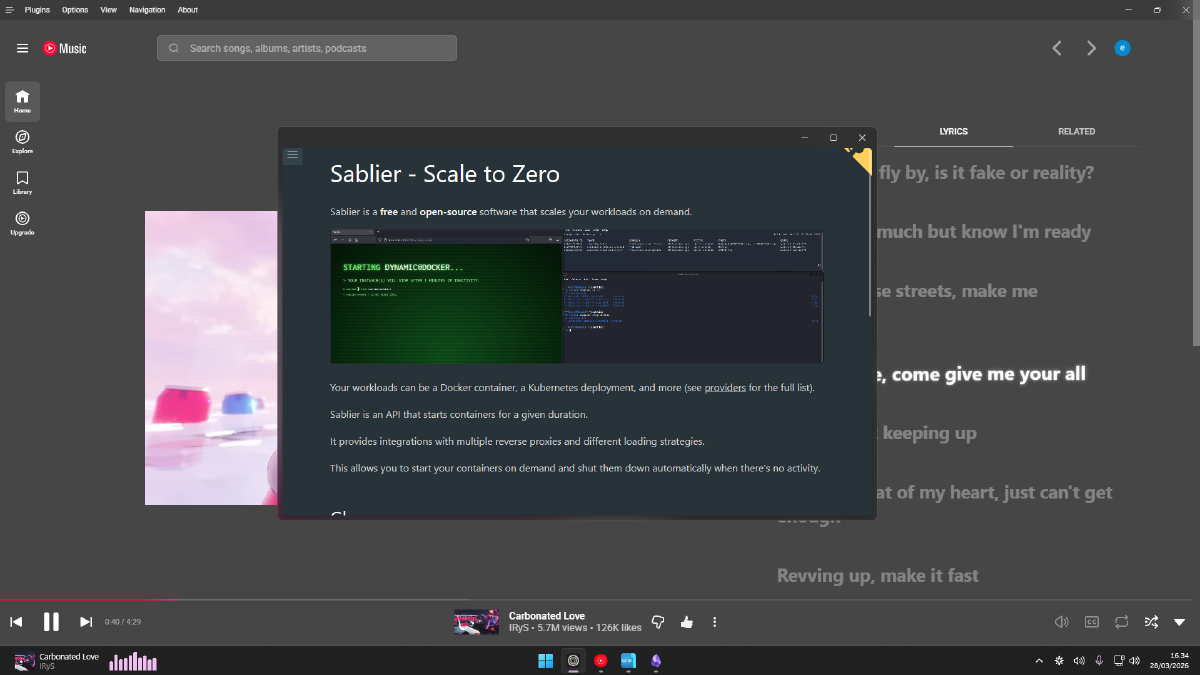
Sablier is a free, open-source software that allows containers to run only when there is an incoming request, automatically stopping them after a certain period of inactivity. It is compatible with Docker, Docker Swarm, and Kubernetes.
Sablier works as an API server that manages the lifecycle of your workloads. It integrates with reverse proxy plugins — including Traefik, Caddy, and Nginx — to intercept incoming requests, “wake up” sleeping workloads, and display a waiting page until the service is ready.
In other words: containers sleep when not in use and wake up automatically when someone accesses them.
Why is This Important for a Homelab? #
Homelab servers — especially those running on Raspberry Pi, mini PCs, or small VPS instances — have limited RAM. Running 10–15 containers at once can drain resources even if most are idle.
Sablier solves this problem with the scale-to-zero concept: containers that aren’t being accessed are temporarily stopped and transparently restarted when a request arrives. Users only experience a slight delay on the first access (a few seconds for the container to boot), after which everything works normally.
How Sablier Works with Traefik #
Sablier consists of two components:
- Sablier server — a container that runs continuously and handles starting/stopping other containers via the Docker socket.
- Sablier plugin for Traefik — a middleware that intercepts requests to Traefik and communicates with the Sablier server to ensure the target container is running before the request is forwarded.
There are two strategies to choose from:
| Strategy | How it Works | Best For |
|---|---|---|
| Dynamic | Displays a loading page while the container boots | Web apps, dashboards |
| Blocking | Holds (pends) the request until the container is ready | APIs, headless services |
Important Note: Starting from Traefik v3.6.0, Sablier configuration can be done directly using Docker labels — no separate dynamic config file is needed for most cases. This article uses Traefik v3.6.12.
Prerequisites #
Before starting, ensure you have:
- Traefik v3.6.12 running as a Docker container
- Docker socket available to Traefik (
/var/run/docker.sock) - Dynamic configuration provider active (file provider or Docker provider)
- At least one container you want to manage with Sablier
Step 1: Register the Sablier Plugin in Traefik #
Open your Traefik static configuration file (traefik.yml or command args in docker-compose.yml), and add the following block to register the Sablier plugin:
# traefik.yml (static config)
experimental:
  plugins:
    sablier:
      moduleName: "[github.com/sablierapp/sablier-traefik-plugin](https://github.com/sablierapp/sablier-traefik-plugin)"
      version: "v1.1.0"
Or if using command args in docker-compose.yml:
command:
  - "--experimental.plugins.sablier.modulename=[github.com/sablierapp/sablier-traefik-plugin](https://github.com/sablierapp/sablier-traefik-plugin)"
  - "--experimental.plugins.sablier.version=v1.1.0"
Check for the latest plugin version at the Traefik Plugin Catalog.
Step 2: Deploy Sablier as a Container #
Add the Sablier service to your docker-compose.yml — ideally in the same file as Traefik:
services:
  sablier:
    image: sablierapp/sablier:1.11.1
    container_name: sablier
    command:
      - start
      - --provider.name=docker
    volumes:
      - /var/run/docker.sock:/var/run/docker.sock
    networks:
      - proxy
    restart: unless-stopped
A few things to note:
- Sablier must be on the same network as Traefik so the plugin can reach it.
- The
docker.sockvolume is required so Sablier can manage other containers. - Do not register Sablier itself as a managed container — otherwise, it will shut itself down.
Step 3: Create Dynamic Configuration for Sablier Middleware #
Since containers managed by Sablier disappear from the Traefik pool when stopped, the Sablier middleware configuration must be created outside the target container — either in a dynamic config file or in the Sablier labels themselves.
Create a file named sablier.yml in your Traefik dynamic config folder:
# dynamic/sablier.yml
http:
  middlewares:
    sablier-dynamic:
      plugin:
        sablier:
          sablierUrl: http://sablier:10000
          group: my-app-group
          sessionDuration: 5m
          dynamic:
            displayName: "Loading service..."
            showDetails: true
            theme: hacker-terminal
            refreshFrequency: 5s

    sablier-blocking:
      plugin:
        sablier:
          sablierUrl: http://sablier:10000
          group: my-app-group
          sessionDuration: 5m
          blocking:
            timeout: 30s
Explanation of key parameters:
sablierUrl— the address of the Sablier server reachable by Traefik.group— the name of the container group to be managed together.sessionDuration— how long the container stays alive after the last request (e.g.,5m,1h).dynamic.theme— the loading page theme; options include:hacker-terminal,ghost,shuffle, etc.blocking.timeout— the maximum time to wait for the container to be ready.
Step 4: Add Labels to Target Containers #
For every container you want Sablier to manage, add two things:
- Sablier Labels — to tag the container and group it.
- Sablier Middleware — in the Traefik router configuration.
Example for the vaultwarden service:
services:
  vaultwarden:
    image: vaultwarden/server:latest
    container_name: vaultwarden
    labels:
      # Standard Traefik Labels
      - "traefik.enable=true"
      - "traefik.http.routers.vaultwarden.rule=Host(`vault.example.com`)"
      - "traefik.http.routers.vaultwarden.entrypoints=websecure"
      - "traefik.http.routers.vaultwarden.tls.certresolver=cloudflare"

      # Add Sablier middleware to the router
      - "traefik.http.routers.vaultwarden.middlewares=sablier-dynamic@file"

      # Sablier Labels — Required
      - "sablier.enable=true"
      - "sablier.group=my-app-group"
    networks:
      - proxy
Important: The
groupvalue in the container labels must match thegroupdefined in the Sablier middleware in Step 3.
Step 5: Ensure Containers Have Healthchecks #
It is highly recommended to use healthchecks on containers managed by Sablier. Without a healthcheck, Sablier cannot distinguish between a container that has just started and one that is actually ready to receive requests.
Add a healthcheck to your container configuration:
services:
  vaultwarden:
    image: vaultwarden/server:latest
    healthcheck:
      test: ["CMD", "curl", "-f", "http://localhost/alive"]
      interval: 10s
      timeout: 5s
      retries: 3
      start_period: 30s
If the image doesn’t provide a built-in healthcheck, adjust the test command to an available endpoint in the application.
Step 6: Apply and Test #
Once all configurations are ready, restart your stack:
docker compose down && docker compose up -dVerify Sablier is running:
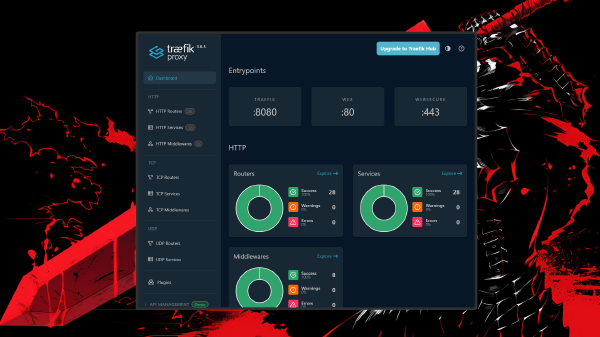
docker logs sablier --followCheck the Traefik dashboard — the sablier-dynamic@file and sablier-blocking@file middlewares should appear in the middleware list.
Now, try to manually stop your target container:
docker stop vaultwardenAccess https://vault.example.com from your browser. You should see a loading page from Sablier while the container restarts. Once the container is ready, the page will automatically refresh to the application.
Dynamic vs Blocking: Which One to Choose? #
Use Dynamic if:
- The service is accessed via a browser by humans.
- A few seconds of a loading page is acceptable.
- Best for: dashboards, web apps, media servers.
Use Blocking if:
- The service is accessed by scripts, API clients, or other applications.
- The client cannot handle redirects to a loading page.
- Best for: APIs, as the client will only experience a longer response time on the first access, without needing to handle redirect or retry logic.
Note: The Dynamic strategy has been reported to have issues on Safari iOS browsers — the loading page may not appear and could show an error instead. Use Blocking as a fallback if you target mobile users.
Additional Tips #
Adjust sessionDuration based on usage patterns. Services accessed frequently can be given a longer duration (e.g., 30m), while rarely used services can be shorter (5m or 10m).
Use --provider.auto-stop-on-startup. Sablier can automatically stop all containers labeled sablier.enable=true when it first runs using the --provider.auto-stop-on-startup flag — useful so all containers start in “sleep” mode without manual stopping.
Exclude healthchecks and monitoring from wake-ups. Add ignoreUserAgent: curl to the middleware configuration so that healthchecks from tools like Uptime Kuma don’t wake up sleeping containers.
http:
  middlewares:
    sablier-dynamic:
      plugin:
        sablier:
          sablierUrl: http://sablier:10000
          group: my-app-group
          sessionDuration: 5m
          ignoreUserAgent: curl  # Add this
          dynamic:
            displayName: "Loading service..."
            theme: hacker-terminal
Conclusion #
With Sablier, you can run more services on the same server without running out of RAM — containers are only active when actually needed and go back to sleep automatically when idle.
This setup is perfect for homelabs with limited resources that want to run many services at once. Combined with the Traefik setup you did previously, the result is an efficient, secure homelab that remains accessible at any time.
If you find any issues or have questions, leave a comment below!
References: Sablier GitHub · Sablier Traefik Plugin · Traefik Plugin Catalog