
If you’re just starting to get interested in building your own home NAS, chances are you’ve already seen YouTube videos or Reddit posts showing off Synology setups with 8 drive bays, QNAP with 32GB RAM, or homelab server racks with flashy blinking lights.
And your first reaction was probably: “Wow, this looks like it needs a serious budget.”
I’m here to tell you it doesn’t have to be that way.
What Is a NAS, Really? #
Before we go further, let’s clear up the definition.
NAS = Network Attached Storage. Literally: storage that can be accessed over a network. That’s it. No requirement to use a specific brand, no rule about how many drive bays you need, no obligation to install applications with a fancy dashboard.
As long as there’s a computer running, storage attached to it, and it can be accessed from other devices on your home network, that’s already a NAS. Period.
My Hardware: Starting with What I Had #
The First Era: A Used N4000 Laptop #
Everything started with an old laptop running an Intel Celeron N4000, 4GB onboard RAM, and a 500GB HDD. This laptop had been sitting around collecting dust with no purpose.
Rather than let it rot, I installed Debian Server and turned it into a Docker host. Specs that most people would consider “unfit” for a server — yet the reality? Idle consumption is only around 5 watts. That’s more efficient than a nightlight.
Now: Adding an i3 6100T Node #
Over time, I saved up and added another device: Intel Core i3-6100T, 8GB RAM, 120GB SSD. Idle consumption is around 15 watts.
Both machines now run Proxmox side by side. Not a fancy cluster, not a high-availability setup — but enough for my day-to-day needs.
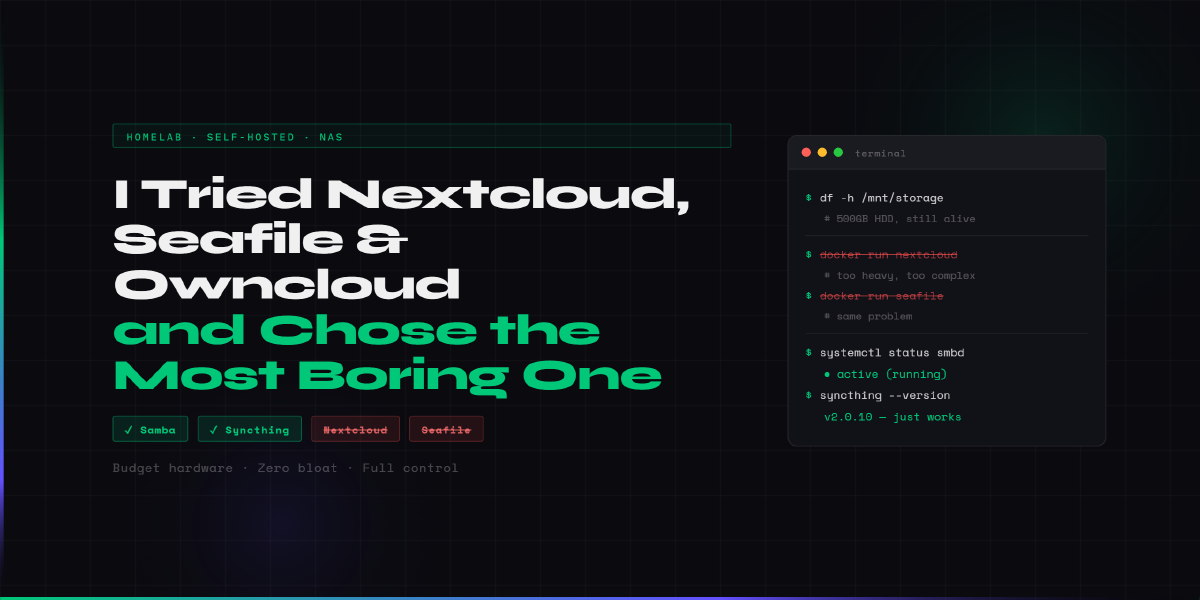
Software Stack: Why Samba + Syncthing Is Enough #
After a long journey of trial and error, my current setup uses just two main tools for storage and sync:
Samba: File Sharing via LAN #

Samba is a protocol that has been around since the dinosaur age (relatively speaking), and that’s precisely its strength. Battle-tested, lightweight, zero drama. On Windows, just open File Explorer, type the server’s IP address, and you have direct access to all your files. Works on Linux too. Works on macOS too.
No additional apps to install on client devices. No updates that suddenly break something. No hassle setting up multiple accounts and shared folder permissions.
Syncthing: Sync Across Devices #

Syncthing handles file synchronization across devices peer-to-peer. Photos from my phone sync directly to the server, work files from my laptop are available on all devices. No data passing through someone else’s server, no cloud subscription fees.
What I Tried (and Didn’t Work Out) #
Honestly, I didn’t land on this setup right away. Back when I was still on Debian with Docker, I tried Nextcloud, Seafile, and Owncloud one by one.
The result? A mess. Installation wasn’t as straightforward as the documentation suggested, configuration was lengthy, and I ended up with software that was bloated for what were actually pretty simple needs. Nextcloud, for instance — to access files from my phone I had to install their app first. The app size isn’t small, and 90% of its features I’d never use.
At the time I also came across the Proxmox Community Script that supposedly made installing Nextcloud and similar tools easier. But I was already burned out, and eventually I realized the problem wasn’t the installation method — it was the software itself that simply didn’t fit my workflow.
That doesn’t mean these tools are bad. They have their own market — people who need team collaboration, calendar sharing, or online office features. But for me? Overkill.
Remote Access: Cloudflared Zero Trust + Netbird #
The setup above is perfect for local access. But what about when I’m away from home?
This is where I use two zero trust VPN solutions: Cloudflared Zero Trust and Netbird.
Cloudflared Zero Trust made sense because I was already using cloudflared for tunneling several services. So I figured I’d make use of what was already there.
Netbird came into the picture because of a frustrating constraint: my ISP uses CGNAT, and my IP appears to be blocked — likely flagged as spam or a bot. As a result, Wireguard and Tailscale don’t work normally. Netbird turned out to be the solution that actually works under these conditions.
The result? Samba and all services on my homelab are accessible from anywhere, anytime, without needing to go home first.
What’s Not Perfect Yet #
I don’t want this article to come across as showing off a flawless setup. There are some real limitations I need to be upfront about:
Storage without RAID. Due to hardware constraints, I haven’t set up RAID. Drives are mounted directly — meaning if the HDD dies, the data goes with it. Game over. Right now I rely on Syncthing as a “backup” for important data only, but that’s not a proper RAID replacement. If you have more than one drive, setting up RAID from the start is a much wiser decision.
Samba has no Web GUI. File access is only through File Explorer or a mount point — there’s no web interface you can open in a browser. If you need a pretty GUI for file management, Samba isn’t the answer. You might want to look at Filebrowser or similar tools.
But for my current needs? Both of these limitations are acceptable. And that’s the whole point — a limitation only becomes a problem if it’s actually a problem for you.
Workflow First, Not Following the Crowd #
This is the part I most want to get across.
The homelab community — especially on YouTube and Reddit — can be very intimidating. People show off setups that keep getting more complex, more services running, bigger racks. And without realizing it, you start to feel like your setup is “not enough” if you’re not using the same stack.
But the more important question is: what do you actually need?
If you just want to access files from anywhere at home and sync photos from your phone, Samba + Syncthing is more than enough. If you want to learn Docker and self-hosting, an old laptop running Debian can do the job. If you want to explore virtualization, Proxmox can be installed on hardware most people have thrown away.
“Potato” hardware is not a barrier. Potato hardware used wisely, tailored to real needs, can have high functionality — with low power consumption and minimal maintenance cost.
Start with What You Have #
If you’re thinking about building a NAS but worried about the upfront cost — don’t wait. An old laptop lying around, a used mini PC, even a Raspberry Pi is already a solid starting point.
Install a lightweight operating system, pick one or two pieces of software that fit your workflow, and start from there. It doesn’t need to be perfect right away. The setup will grow organically as your needs emerge — exactly like what happened with mine.
The important thing: choose tools you understand, not tools that get endorsed the most.
Because in the end, the best NAS is the one that works and you know how it works — not the most expensive or the one with the most features.
If you have questions about this setup or want to discuss further, feel free to leave a comment below. I’m no expert, but I enjoy sharing experiences.