
Building a home server is deeply satisfying—until you realize that accessing your web app dashboards over plain HTTP feels insecure and unprofessional. The problem? Standard SSL verification methods usually require opening Port 80 to the internet, which poses a significant security risk to your home network.
The smart solution for homelab enthusiasts is using Traefik as a reverse proxy with the DNS-01 Challenge method. This allows you to obtain official Let’s Encrypt SSL certificates without ever performing port forwarding for Port 80 on your router.
This tutorial will guide you through a seamless Docker setup so all your self-hosted services (like Jellyfin, Pi-hole, or Nextcloud) can be accessed via HTTPS using your real domain automatically.
Homelab Prerequisites #
Before executing the configuration, ensure your home server infrastructure is ready:
- Local Server: An old PC, Raspberry Pi, or Mini PC with Docker and Docker Compose installed.
- Personal Domain: You must own a domain (e.g., homelab-kita.com) with DNS managed by Cloudflare.
- Cloudflare API Token: A specific token with
Zone-DNS-Editpermissions so Traefik can “drop” the SSL verification code into your Cloudflare DNS records. - Local DNS/Pi-hole (Optional): To point your domain to the server’s local IP without routing traffic through the external internet.
Step-by-Step Configuration #
1. Folder Structure and File Permissions #
On your home server, create a folder structure to ensure your certificate data persists when containers are rebuilt.
mkdir -p ~/homelab/traefik/data
touch ~/homelab/traefik/data/acme.json
chmod 600 ~/homelab/traefik/data/acme.json
Technical Note: The acme.json file is highly sensitive as it stores your SSL private keys. Let’s Encrypt and Traefik require strict access permissions (600) so other users on your Linux system cannot read it.
2. Traefik Docker Compose Configuration #
Create a docker-compose.yml file inside the traefik folder. This configuration is specifically designed for homelab scenarios that prioritize privacy and automation.
services:
traefik:
image: traefik:v3.0
container_name: traefik
restart: always
ports:
- "443:443" # Primary HTTPS Port
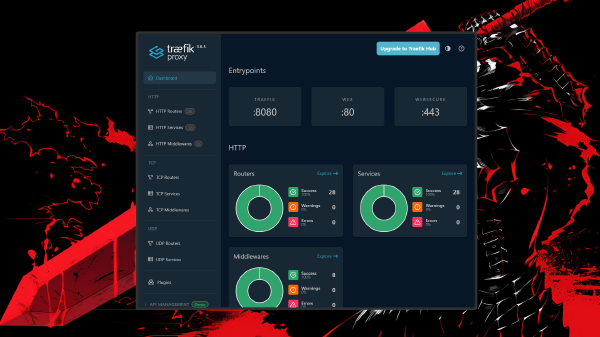
- "8080:8080" # Traefik Dashboard (Local Access)
environment:
- CF_DNS_API_TOKEN=your_cloudflare_token_here
volumes:
- /var/run/docker.sock:/var/run/docker.sock:ro
- ./data/acme.json:/acme.json
command:
- --api.insecure=true
- --providers.docker=true
- --providers.docker.exposedbydefault=false
- --entrypoints.websecure.address=:443
- # DNS-01 Challenge Settings
- --certificatesresolvers.homelab-resolver.acme.dnschallenge=true
- --certificatesresolvers.homelab-resolver.acme.dnschallenge.provider=cloudflare
- --certificatesresolvers.homelab-resolver.acme.email=your-email@mail.com
- --certificatesresolvers.homelab-resolver.acme.storage=/acme.json
networks:
- proxy
networks:
proxy:
external: true3. Connecting Web Apps to Traefik #
Now, let’s apply SSL to one of your homelab services (e.g., a server dashboard). You only need to add the following labels to the target application’s docker-compose file:
services:
  my-dashboard:
    image: nginx:alpine
    networks:
      - proxy
    labels:
      - "traefik.enable=true"
      - "traefik.http.routers.dash.rule=Host(`dash.homelab-kita.com`)"
      - "traefik.http.routers.dash.entrypoints=websecure"
      - "traefik.http.routers.dash.tls.certresolver=homelab-resolver"
Technical Note: When the application container starts, Traefik detects these labels via docker.sock. It then contacts Cloudflare to verify domain ownership, downloads the SSL certificate, and enables HTTPS encryption in real-time.
Why This is the Best Approach for Your Homelab #
Using Traefik with the Cloudflare DNS-01 challenge is the ultimate “shortcut” for home server users. Most residential ISPs block Port 80, which is required for standard Let’s Encrypt HTTP-01 verification. With the DNS method, proof of domain ownership happens at the DNS record level. This keeps your server safe behind your firewall without a single port exposed to the internet (especially if you use a VPN or Tailscale for access).
From a management perspective, this method is incredibly low-maintenance. You no longer need to run manual Certbot scripts every three months. Once the initial setup is done, every time you add a new service in Docker, you simply add a few labels, and—boom—your service instantly has that green HTTPS padlock.
Furthermore, a reverse proxy centralizes certificate management. You don’t need to install SSL on every container individually. Traefik acts as the “security guard” at the front door (Port 443), decrypting traffic before routing it to the containers within your internal homelab network.
Conclusion and Troubleshooting #
Building an automated SSL system with Traefik, Cloudflare, and Docker makes your homelab infrastructure more secure and aligns it with enterprise standards. Say goodbye to “Unsecured” warnings when accessing your private data from your living room or bedroom.
Common Troubleshooting:
- Bad Gateway (502): Ensure your web application is on the same Docker network as Traefik (in this example, the
proxynetwork). - SSL Not Issuing: Check the container logs with
docker logs traefik. Verify that your Cloudflare token has sufficient permissions to edit DNS records. - DNS Resolution: If you are inside your home network, ensure the domain points to your server’s local IP (via Pi-hole or
/etc/hosts) to avoid unnecessary routing to the external internet.