
Building self-hosted apps at home often results in a pile of notes filled with confusing port numbers. From port 8080 and 9000 to 3000, you have to remember each one just to access a simple service. Besides being a hassle, leaving multiple ports open on your home server poses a significant security risk.
The main issue is the broad attack surface. The more ports you open in your firewall or router, the more entry points you create for external threats. Not to mention the complexity of manually managing SSL certificates (HTTPS) for every single application.
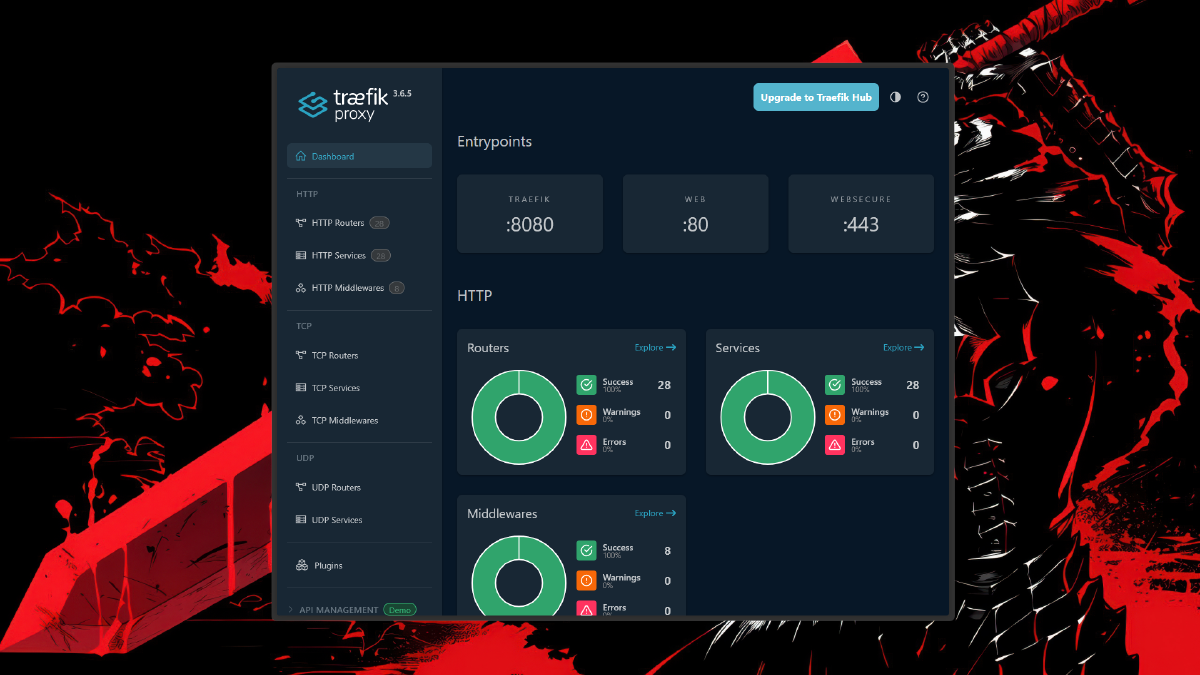
In this article, we will solve these problems using Traefik. I will show you step-by-step how to configure Traefik so all your Docker applications can be accessed via domain names (like app.local), allowing you to open only ports 80 and 443.
Prerequisites #
Before starting the configuration process, ensure you have the following ready:
- A computer or Raspberry Pi running Linux (Ubuntu/Debian recommended).
- Docker and Docker Compose installed on your system.
- Terminal/SSH access to your home server.
- A domain (either a public domain or a local domain via
/etc/hosts). - Basic understanding of YAML file structures.
Step-by-Step Traefik Configuration #
1. Create an External Docker Network #
The first step is to create a dedicated network so Traefik can communicate with other containers without exposing their ports to the public.
docker network create traefik-publicTechnical Logic: We use an external network so that whenever we add a new application, we can simply connect it to this traefik-public network without needing to restart the main Traefik service.
2. Compose the Traefik Docker Compose File #
Create a directory named traefik and create a docker-compose.yml file inside it.
services:
  traefik:
    image: traefik:v2.10
    container_name: traefik
    restart: always
    ports:
      - "80:80"
      - "443:443"
      - "8080:8080" # Dashboard (can be closed for production)
    command:
      - "--api.insecure=true"
      - "--providers.docker=true"
      - "--providers.docker.exposedbydefault=false"
      - "--entrypoints.web.address=:80"
    volumes:
      - /var/run/docker.sock:/var/run/docker.sock:ro
    networks:
      - traefik-public

networks:
  traefik-public:
    external: true
Technical Logic: The line --providers.docker.exposedbydefault=false is crucial for security. This ensures Traefik won’t automatically publish Docker containers unless we explicitly grant permission via labels.
3. Connecting an Application to Traefik #
As an example, we will run the Whoami application. Use the following configuration to route traffic through the reverse proxy.
services:
  my-app:
    image: traefik/whoami
    container_name: app-demo
    networks:
      - traefik-public
    labels:
      - "traefik.enable=true"
      - "traefik.http.routers.myapp.rule=Host(`app.local`)"
      - "traefik.http.services.myapp.loadbalancer.server.port=80"

networks:
  traefik-public:
    external: true
Technical Logic: Notice that we do not use the ports: command in this application. The app is only accessible via Traefik through the app.local domain. This closes the gap for direct access to the application port from the outside.
graph LR
    subgraph Internet
        User((User/Client))
    end
    subgraph "Docker Host / Cluster"
        Traefik[Traefik Proxy]
        subgraph "Backend Services"
            App1[(App Container A)]
            App2[(App Container B)]
            App3[(App Container C)]
        end
        DockerSocket[(Docker Socket / Provider)]
    end
    %% Traffic Flow
    User -->|HTTP/HTTPS| Traefik

    %% Config Flow (Auto Discovery)
    DockerSocket -.->|Service Discovery| Traefik

    %% Routing logic
    Traefik -->|Host: app-a.local| App1
    Traefik -->|Host: app-b.local| App2
    Traefik -->|Path: /api| App3

    style Traefik fill:#24a1c1,stroke:#333,stroke-width:2px,color:#fff
    style DockerSocket fill:#f4f4f4,stroke:#666,stroke-dasharray: 5 5
Why Use Traefik for Self-Hosting? #
Traefik is specifically designed for the modern container era. Unlike conventional Nginx, which requires you to manually edit .conf files every time you add a new app, Traefik works dynamically. It monitors the Docker Socket and automatically reconfigures itself when it detects a new container spinning up.
From a security standpoint, this method is highly effective at minimizing open ports. In a homelab, you might have dozens of services. Without a reverse proxy, you’d have to manage dozens of ports in your firewall. With Traefik, only ports 80 and 443 are open to the outside world, while internal traffic is managed neatly behind the scenes.
Additionally, Traefik simplifies automatic SSL certificate integration via Let’s Encrypt. This provides an extra layer of protection for your data when accessed over the internet, making it the gold standard for anyone building a professional and secure home server.
Conclusion #
Using Traefik as a reverse proxy is a smart solution for managing port complexity in your homelab. By centralizing access to ports 80 and 443, you not only gain the convenience of domain-name access but also significantly improve the security posture of your self-hosted apps.

How to Setup Free SSL in Your Homelab Using Traefik and Cloudflare (No Port 80/HTTP Needed)
Common Troubleshooting: #
- Domain unreachable: Ensure the
/etc/hostsfile on the client computer points to the server’s IP, or that your DNS records are correct. - Gateway Error (502): Ensure the port defined in the labels matches the internal port running inside the application container.
- Permission Denied on docker.sock: Ensure the user running Docker Compose has permission to access the socket.
Are you having trouble connecting your first app to Traefik? Share your obstacles or questions in the comments below, let’s discuss!