Getting approved for Google AdSense is a major milestone for any blog owner. However, the real challenge for users of Static Site Generators (SSG) like Hugo is figuring out how to insert ad codes so they appear neatly and efficiently without breaking the theme’s structure.
Many beginners feel confused when placing ad scripts in Hugo because there is no “one-click plugin” system like in WordPress. In reality, Hugo’s transparent folder structure actually makes it easier for us to have full customization, both for Auto Ads and manual ad placement within articles.
In this tutorial, we will discuss how to insert Google AdSense ads in Hugo thoroughly. I will guide you from the basic code integration in the head section to the most flexible way of displaying ads within your content using the Shortcode feature.
Prerequisites #
Before starting, ensure you have prepared the following items for a smooth integration process:
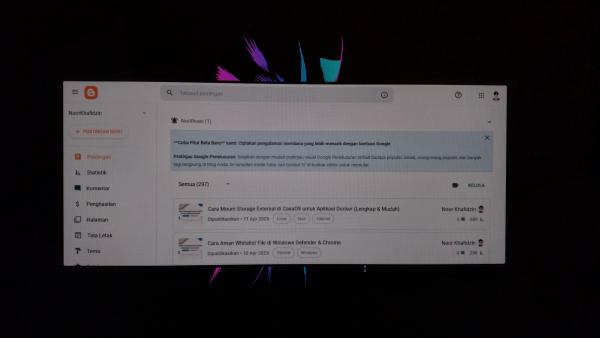
- Access to an active Google AdSense Dashboard or one that is currently under review.
- Access to your Hugo project directory (locally or via repository).
- A Hugo theme that supports partial layout customization (such as Blowfish or other popular themes).
- Basic understanding of Hugo’s folder structure (
layouts,static, andcontent).
Step-by-Step: How to Insert Google AdSense Ads in Hugo #
Follow these technical steps to integrate AdSense into your static website.
1. Obtain the AdSense Code Snippet #
Log in to your Google AdSense account, add your website, and copy the provided Code Snippet. The code usually looks like the JavaScript script below:
<script async src="https://pagead2.googlesyndication.com/pagead/js/adsbygoogle.js?client=ca-pub-xxxxxxxxxxxxxxxx"
     crossorigin="anonymous"></script>
2. Insert the Script into the Site Header #
For Google to verify your site and run Auto Ads, the script must be placed inside the <head> tag.
In Hugo, you should not edit files in the themes folder directly. Instead, create a new file in:
layouts/partials/extend_head.html (if you are using Blowfish) or your theme’s specific header partial file.
Why here? By placing it in the root project’s layouts folder, Hugo will override the original theme file without damaging the vendor’s default code.
3. Set Up the ads.txt File for Security #
Google requires an ads.txt file to prevent unauthorized ad inventory sales.
- Create a new file named
ads.txtinside thestatic/folder. - Paste the verification code line provided by AdSense (example:
google.com, pub-xxxxxxxxxxxxxxxx, DIRECT, f08c47fec0942fa0).
Placing it in the static folder ensures this file is accessible directly via yourdomain.com/ads.txt after the site is deployed.
4. Create a Shortcode for In-Article Ads #
This is the most crucial part of how to insert Google AdSense ads in Hugo so that ads appear in the middle of your content. We will create a custom shortcode.
Create a new file at: layouts/shortcodes/ads-in-article.html. Insert your unit ad code (Display Ads) there:
<div class="ad-container" style="margin: 20px 0; text-align: center;">
    <ins class="adsbygoogle"
         style="display:block"
         data-ad-client="ca-pub-xxxxxxxxxxxxxxxx"
         data-ad-slot="xxxxxxxxx"
         data-ad-format="auto"
         data-full-width-responsive="true"></ins>
    <script>
         (adsbygoogle = window.adsbygoogle || []).push({});
    </script>
</div>
5. Call the Ad in Your Markdown File #
Now, you can specifically determine which paragraph the ad should appear after. Open one of your .md content files and insert the following code:
This is the opening paragraph of my article.

{{< ads-in-article >}}

This is the follow-up paragraph after the ad.
Why Use Shortcodes? #
Using a Shortcode is far better than hardcoding ad scripts directly into the single.html layout file. With shortcodes, you have full control over the article’s aesthetics. Ads won’t appear haphazardly, which could potentially ruin the user reading experience (UX).
Furthermore, this method provides management flexibility. If you ever want to stop showing ads or switch to another provider, you simply edit the content of the ads-in-article.html file without having to comb through hundreds of Markdown files one by one. If the file is left empty, the ad area will automatically disappear from all articles.
Impact on Performance (LCP) #
An essential aspect of how to insert Google AdSense ads in Hugo is understanding its impact on site speed. Since Hugo is a very fast static site, adding external scripts from Google will inevitably increase the load time.
Using the async attribute on the AdSense script is critical so that the browser does not stop the page rendering process while downloading the ad script. Always monitor your Largest Contentful Paint (LCP) values in Google PageSpeed Insights after installing ads to ensure your SEO scores remain intact.
Conclusion #
Installing ads in Hugo requires a manual approach but yields very clean and structured results. By utilizing the layouts/partials folder for the header and layouts/shortcodes for mid-article ads, you have implemented best practices in Hugo development.
Common Troubleshooting #
- Ads Not Appearing: Ensure the status in the AdSense dashboard is “Ready” and you are not using an AdBlocker while checking the site.
- Shortcode Error: Double-check that the syntax
{{< ads-in-article >}}is correct and the.htmlfile exists in the proper folder. - ads.txt 404 Error: Make sure the file is in the root of the
staticfolder, not inside another sub-folder.
Have you successfully implemented how to insert Google AdSense ads in Hugo on your blog? If you encounter any technical hurdles or have additional tips, feel free to discuss them in the comments section below!
Next article: I will create a tutorial on how to set up Lazy Loading for AdSense ads in Hugo so your PageSpeed score stays at 100.